
GitHub Repositories
Connect a repository#
Linking happens per target, so a TypeScript and a Python SDK can live in separate repositories.
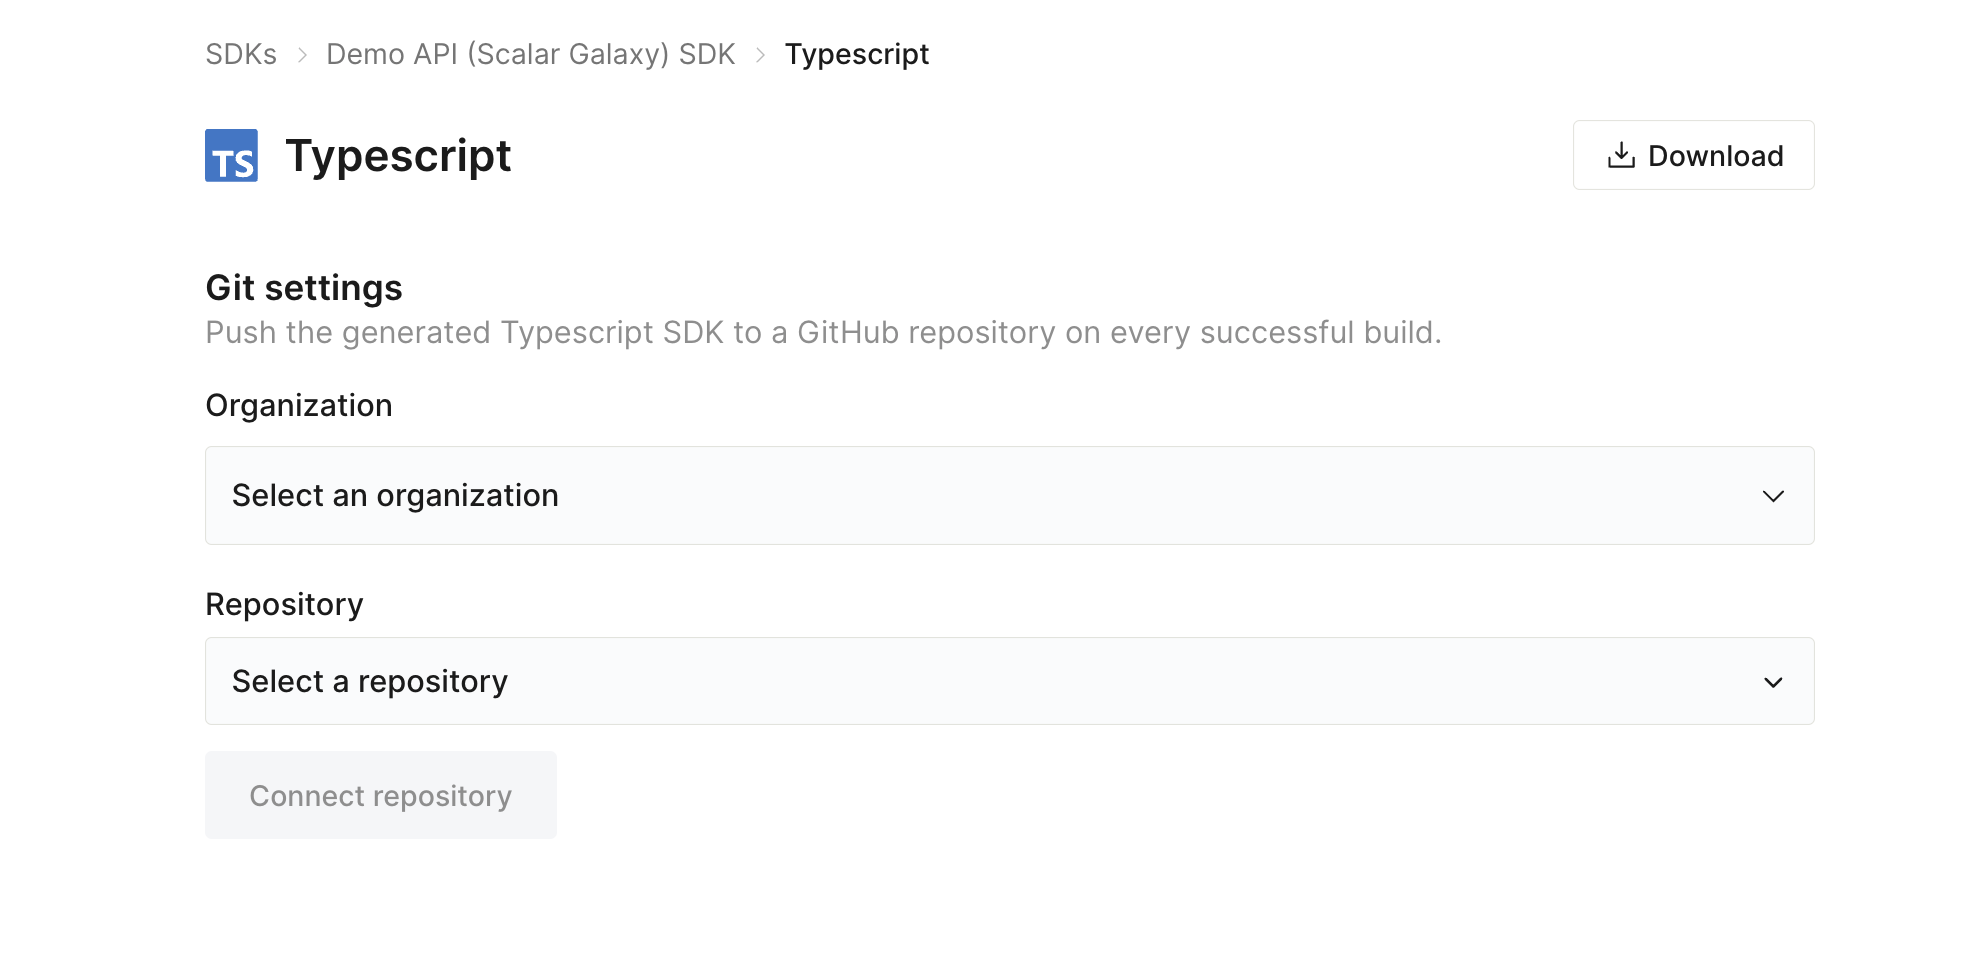
The first time you connect, GitHub asks you to install the Scalar app and grant it access to the repositories you want to use. Scalar only needs to read and write repository contents and open pull requests.
Open the target, then under Git settings choose the Organization and Repository to push the generated SDK to.
Click Connect repository. From now on, every successful build pushes the generated SDK to this repository.
How syncing works#
Builds never commit straight to your default branch. The repository follows a three-branch flow that Scalar manages together with the generated workflows, all of which run on the default GITHUB_TOKEN — no extra token to provision.
scalar-generatedholds pristine generator output. Scalar pushes here; you never commit to it.scalar-nextholds that output merged with your custom code. This is where you commit your own changes, directly or through pull requests, and where Scalar merges each regeneration.- The default branch (
mainunless you configure otherwise) only ever receives released states. Scalar keeps a release pull request open fromscalar-nextagainst it, so the diff you review is the entire pending release. Merging that pull request is what releases and publishes the version. scalar-merge-conflictcarries a regeneration that could not be merged cleanly; it arrives as a pull request for you to resolve.
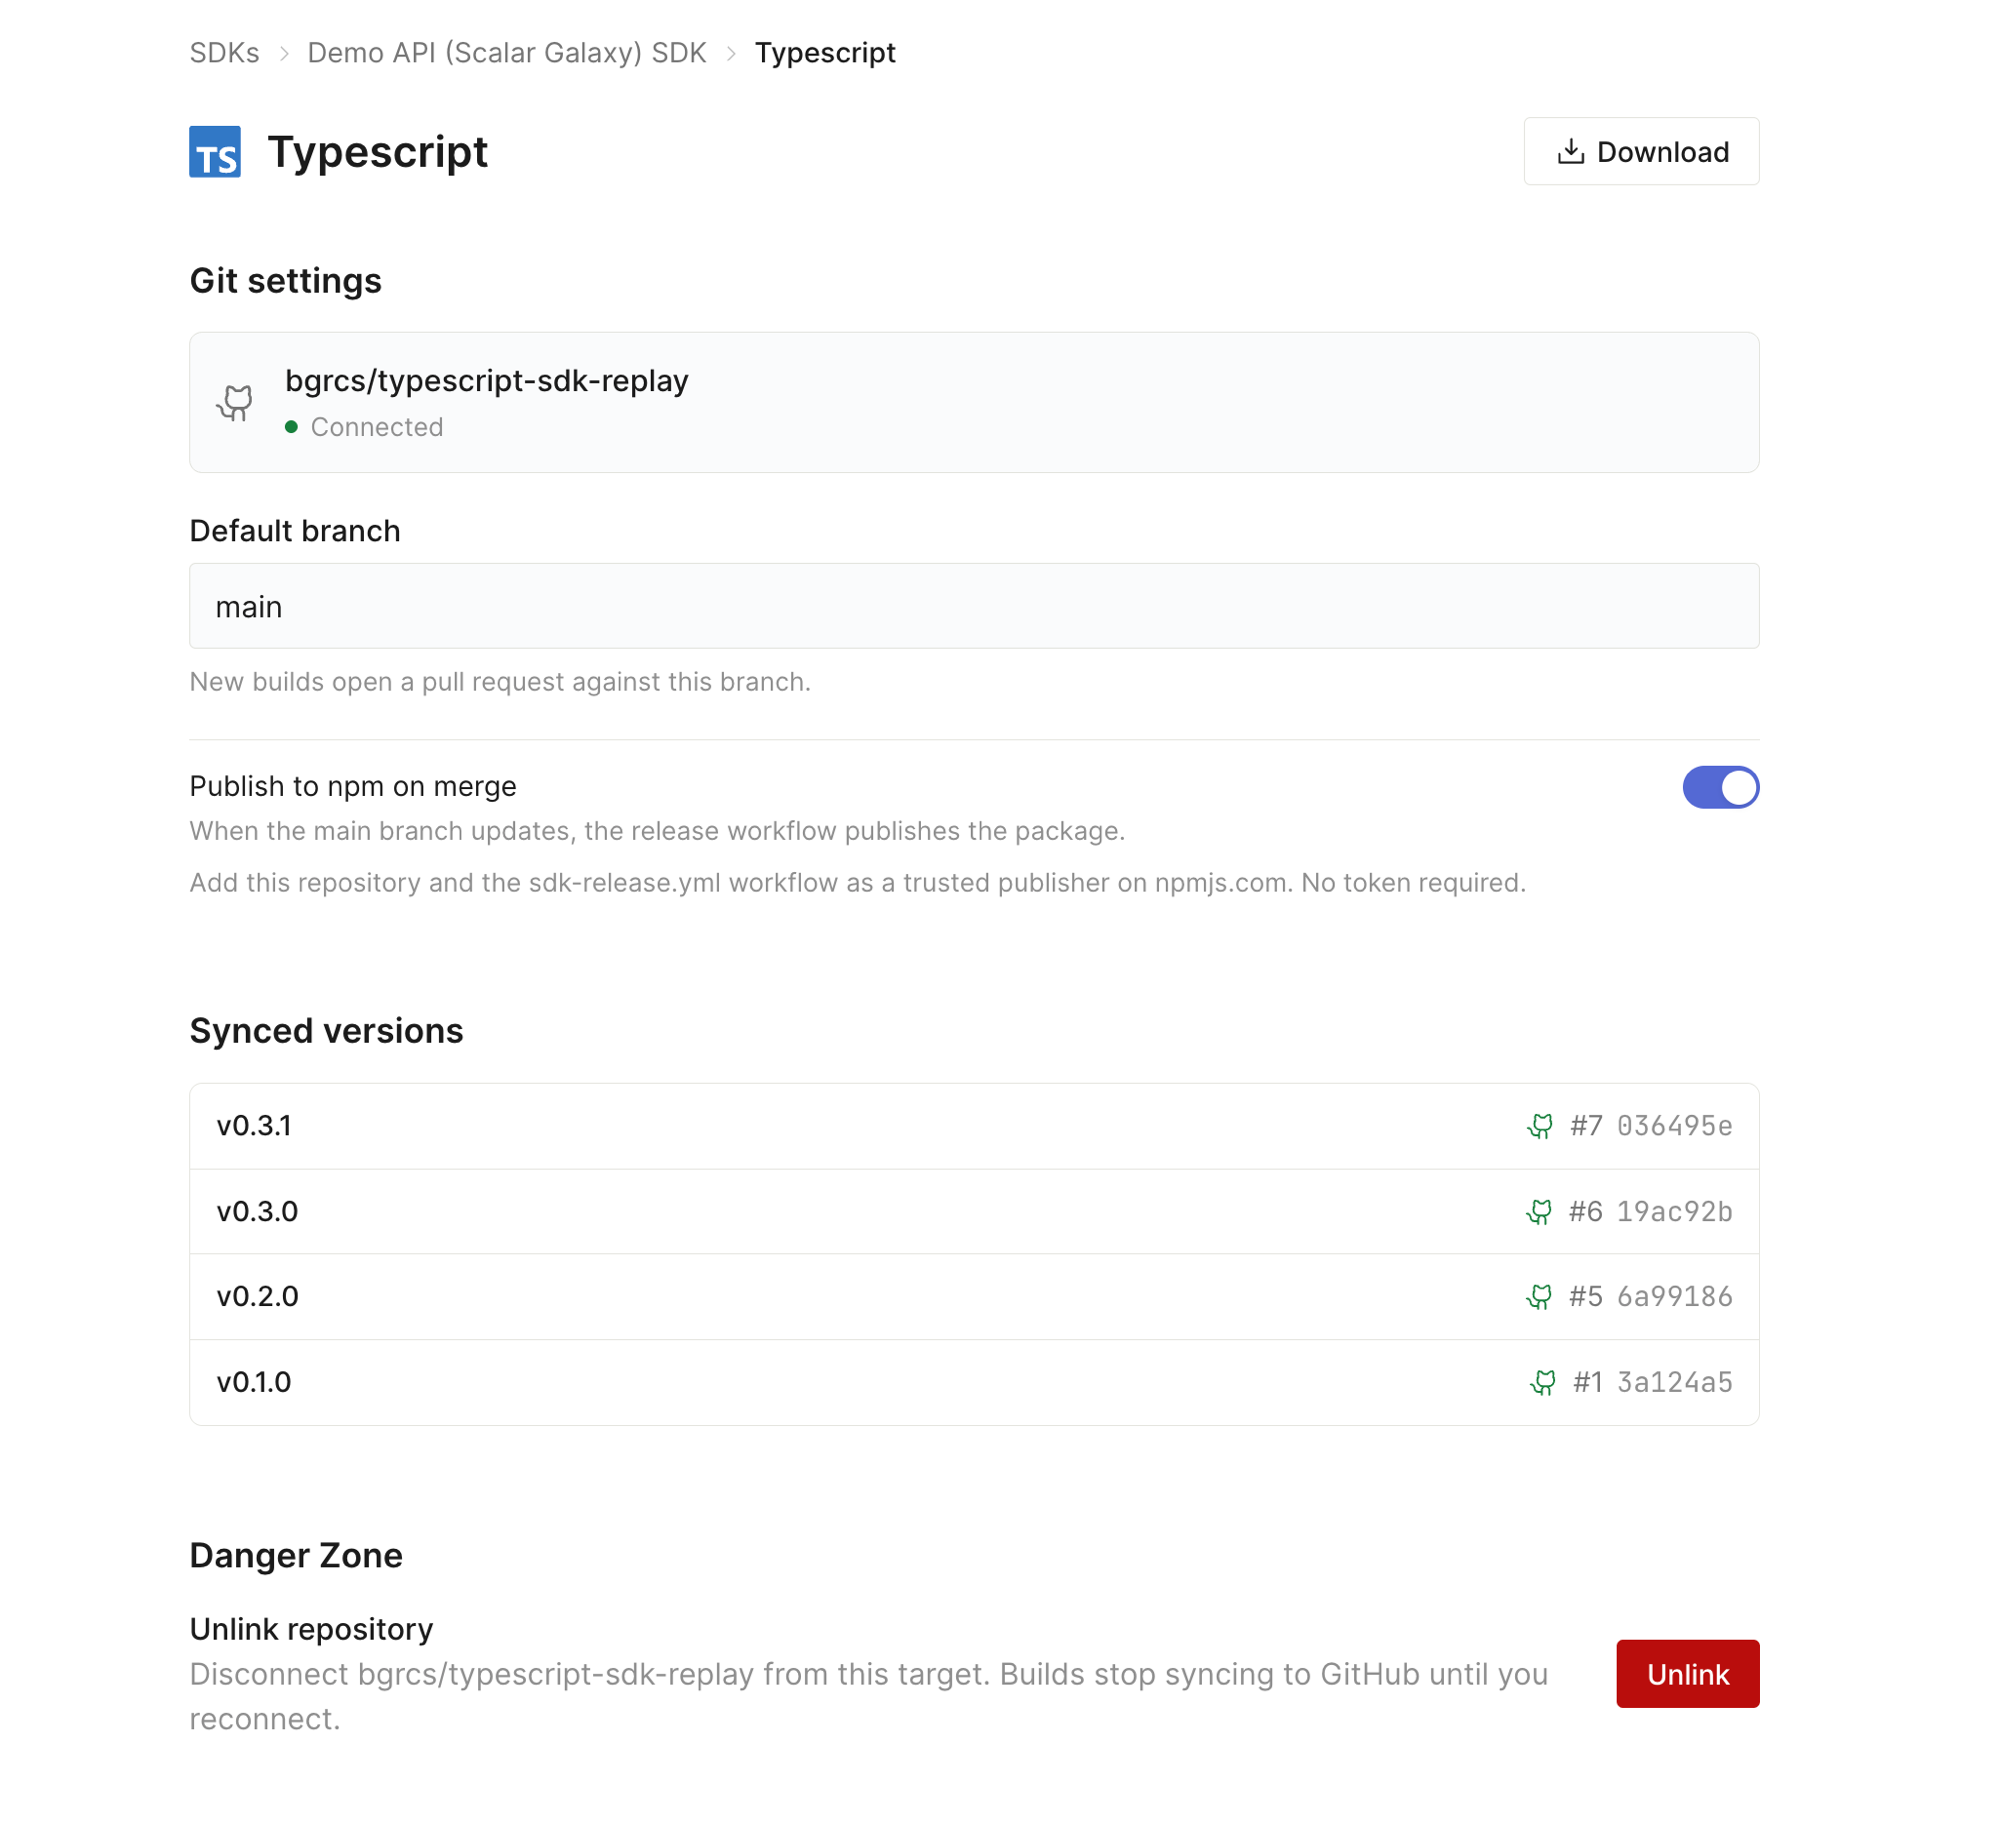
Synced versions: the target lists each SDK version next to the pull request and commit that delivered it, so you can trace a published version back to its build.
[!NOTE] Linking only controls where generated code goes. Turn on Publish to <registry> on merge (or add a
publishblock to the target) to also push the package to its registry. See Publishing.
Promotion#
By default every successful build reaches production on its own: it pushes to scalar-generated, merges into scalar-next, and updates the release pull request. Set a target to promote manually and that last part waits for you.
A manual target still builds on every change, and its staging repository — a private playground that mirrors the latest build — is still updated. What waits is the push to the repository your team works in, until you click Promote to production.
Use it when generated output should be reviewed before it lands in your repository, or when you want to decide the moment a release pull request opens.
Choosing the mode#
Promote manually sits under the organization, repository and default branch in the connect form. Leave it off for automatic promotion.
Open the target, select Configure on the Production row, and flip Promote manually. The change takes effect immediately; it is not tied to a new version.
Promoting a build#
A build waiting in staging shows Promote to production on the Staging row. Promoting pushes that build's generated output to scalar-generated, merges it into scalar-next, and opens the release pull request — exactly what an automatic build does, at a time you choose. Your custom code on scalar-next is preserved either way.
The pipeline card only ever offers the newest build, and the action clears once you have promoted it, so an older build cannot be pushed over one production already has. The version history offers each staged build on its own row, and warns you when the one you picked has been superseded by a newer build.
Switching back to automatic#
Turning Promote manually off ships the build already waiting, so production catches up instead of skipping it. Every build after that pushes on its own again.
[!NOTE] Unlinking a repository clears the promotion mode along with the rest of the link, so a repository you connect later starts out on automatic promotion.
Configuration equivalent#
{
  "targets": {
    "typescript": {
      "promotion": "manual"
    }
  }
}| Property | Type | Description |
|---|---|---|
promotion |
"automatic" | "manual" |
When this target's builds reach its production repository. manual holds each build at staging until it is promoted. Defaults to automatic, which is also what an absent key means. |
Your custom code is preserved#
You can edit generated files in your repository on scalar-next. Scalar performs a three-way merge on every regeneration, so your changes are carried forward into the next release pull request instead of being overwritten. Review it as usual; only genuine conflicts need your attention. See Custom Code.
Repository prerequisites#
- Branch protection on
scalar-nextand the default branch must allow the Scalar app and thegithub-actionsbot to push, or be left unprotected. The default branch only ever advances by merging a release pull request, andscalar-nextreceives each released state back from the release workflow. - No Actions settings changes are required: the generated workflows declare their own permissions and never create pull requests.
Configuration equivalent#
Linking from the dashboard sets the target's destinations in your SDK configuration. You can also set it directly:
{
  "targets": {
    "typescript": {
      "destinations": {
        "production": {
          "repo": "acme/acme-typescript",
          "branch": "main"
        }
      }
    }
  }
}| Property | Type | Description |
|---|---|---|
repo |
string |
The owner/repo the generated SDK is pushed to. |
branch |
string |
The repository's default branch, which releases are promoted to. Defaults to main. Generated output itself always goes to the fixed scalar-generated branch. |
Adding repository secrets#
OIDC trusted publishing needs no secrets. Token-based publishing, and Maven Central's GPG signing, store credentials as secrets on the SDK repository. The generated workflows read them by exact name, so the name has to match.
In the SDK repository on GitHub, go to Settings → Secrets and variables → Actions.
Select New repository secret.
Enter the Name the workflow expects (for example NPM_TOKEN) and paste the value, then Add secret. The per-language pages list the exact name each registry uses.
[!NOTE] Secrets are scoped to the repository. If you publish several targets from one repository, add each registry's secret to that same repository.
Unlink a repository#
To stop syncing, open the target, select Configure on the Production row, and use Unlink. Builds stop pushing to GitHub until you reconnect. Code already in the repository, and anything already published, is left untouched.